If you enjoy entertaining guests or just eating outdoors, an outdoor dining table can be a great addition to your backyard.
Building your own outdoor dining table can be a rewarding and cost-effective way to furnish your outdoor space.
In this article, we will provide a step-by-step guide on how to build an outdoor dining table that is both beautiful and functional.
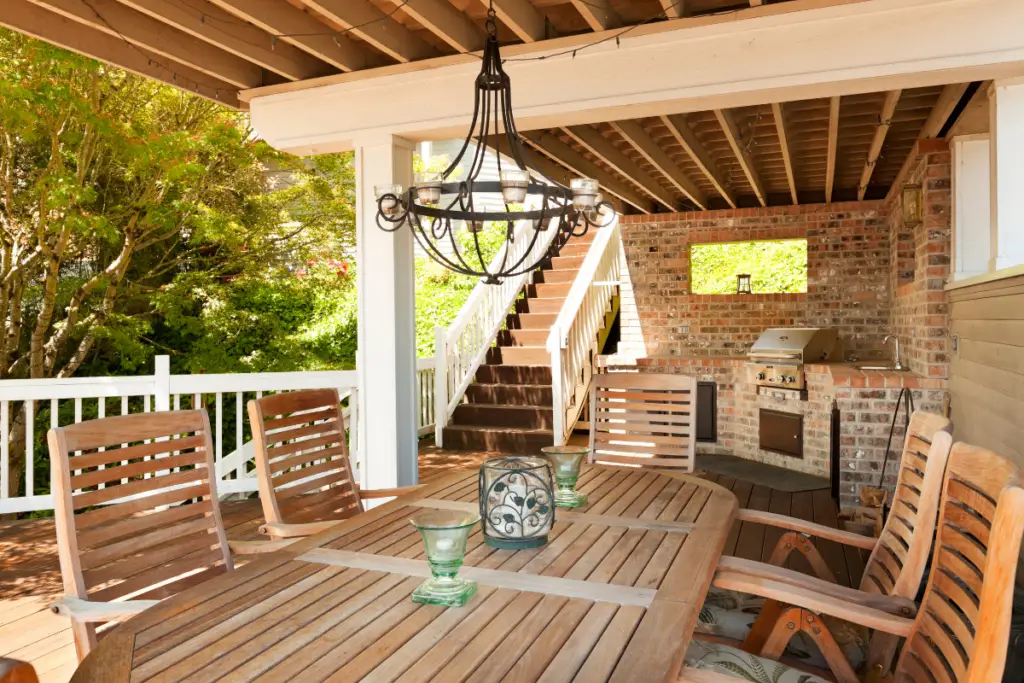
Table of Contents
Step 1. Tools and Materials
Before you begin building your outdoor dining table, you will need to gather the necessary tools and materials. The tools you will need include:
- Circular saw or table saw
- Miter saw or chop saw
- Jigsaw
- Power drill
- Orbital sander
- Clamps
- Tape measure
- Speed square
- Pencil
- Safety glasses
- Dust mask
The materials you will need include:
- Wood (we will discuss wood options in the next section)
- Screws
- Wood glue
- Sandpaper (various grits)
- Protective coating (we will discuss coating options later)
Step 2. Choosing the Right Wood
When it comes to building an outdoor dining table, you want to choose a wood that is durable and weather-resistant. Cedar, redwood, and teak are all popular choices for outdoor furniture because they are naturally resistant to rot and insects. Pressure-treated pine is also a popular choice because it is affordable and can be stained to match other outdoor furniture.
Step 3. Designing Your Outdoor Dining Table
The first step in building your outdoor dining table is designing the table. You will need to decide on the size and shape of the table, as well as any additional features such as an umbrella hole or built-in cooler.
Step 4. Cutting the Wood
Once you have your design in place, it’s time to start cutting the wood. Use a circular saw or table saw to cut the legs and frame of the table, and a miter saw or chop saw to cut the angles for the legs.
Step 5. Assembling the Base
After cutting the wood, it’s time to assemble the base of the table. Use wood glue and screws to attach the legs to the frame. Use clamps to hold the pieces in place while the glue dries.
Step 6. Building the Tabletop
Next, it’s time to build the tabletop. Cut the boards for the tabletop and use a jigsaw to cut the curved edges. Use wood glue and screws to attach
the boards together, making sure they are level and flush with each other.
Step 7. Sanding and Finishing
Once the tabletop is assembled, it’s time to sand it down to make it smooth. Start with a coarse grit sandpaper and work your way up to a fine grit sandpaper. After sanding, wipe the tabletop down with a damp cloth to remove any dust.
Step 8. Attaching the Tabletop to the Base
After sanding, it’s time to attach the tabletop to the base. Flip the tabletop upside down and position the base on top of it. Use screws to attach the base to the tabletop, making sure everything is level.
Step 9. Adding Protective Coating
To protect your table from the elements, it’s important to add a protective coating. There are a variety of options for protective coatings, including polyurethane, varnish, and oil-based finishes. Apply the coating according to the manufacturer’s instructions, making sure to let it dry completely before using the table.
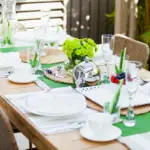
Step 10. Decorating Your Table
Once your table is built and protected, it’s time to decorate it. You can add chairs, cushions, tablecloths, and other accessories to make your outdoor dining area comfortable and stylish.
Tips and Tricks
- Before starting your project, make sure you have a clear plan in place.
- Take your time and be precise when cutting and assembling the wood.
- Use clamps to hold pieces in place while the glue dries.
- Sand the wood thoroughly before applying any protective coating.
- Consider adding an umbrella hole or built-in cooler for added functionality.
Conclusion
Building your own outdoor dining table can be a fun and rewarding project. By following the steps outlined in this article, you can build a beautiful and functional table that will enhance your outdoor space.
Remember to take your time, be precise, and protect your table from the elements. Happy building!
- How to Build a Planter Box for Bamboo: A Step-by-Step Guide

- Can Robotic Lawnmowers Handle Steep Slopes?
- Do You Need a Specific Lawn for a Robotic Lawnmower? Expert Advice
- Are Robotic Lawnmowers Safe for Pets and Children? Safety Features of Robotic Lawnmowers
- Why Use Robotic Lawnmowers? Advantages of Using a Robotic Lawnmower
- Is the GARDENA SILENO City 300 Cordless or Corded? A Clear Answer