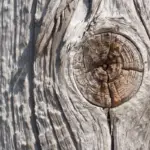
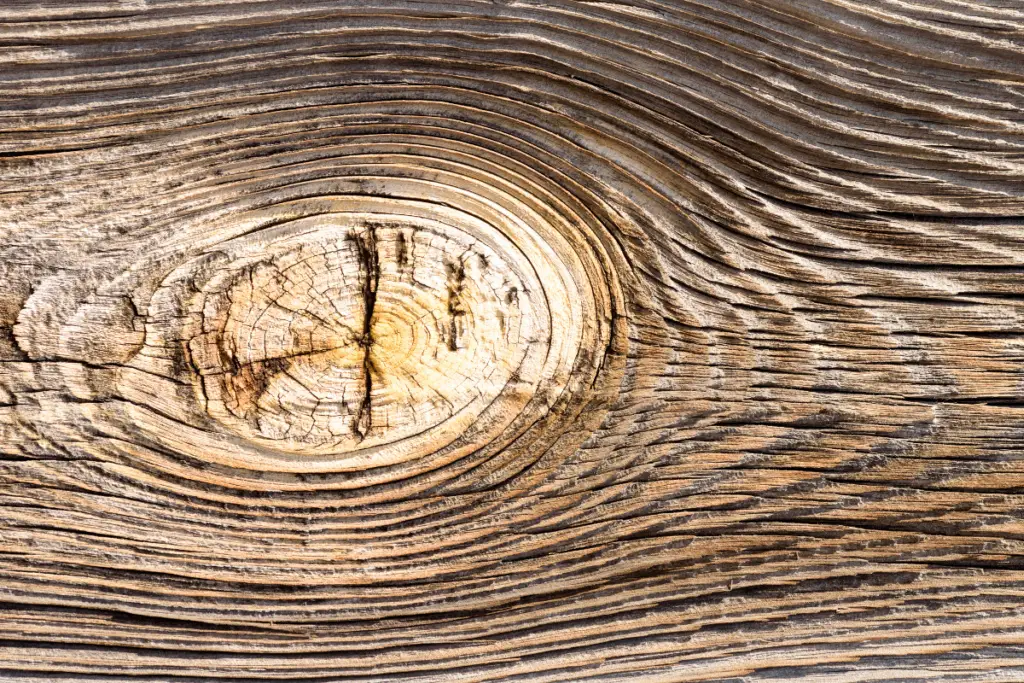
The wood knotting solution is a product that is used to seal knots in the wood. Knots are natural imperfections in the wood that can cause problems when painting or staining.
Knotting solution seals the knots, preventing them from bleeding through the paint or stain. Knotting solution is a versatile product that is easy to use and can be applied to a variety of surfaces.
When using a wood knotting solution, it is important to follow the manufacturer’s instructions carefully.
The first step is to clean the surface of the wood thoroughly, removing any dirt or debris.
Next, the knotting solution should be stirred well before application. The solution can then be applied to the knots using a brush or a cotton swab.
It is important to apply the solution generously, ensuring that the knot is completely covered. Once the solution has dried, the wood can be sanded and painted or stained as desired.
The wood knotting solution is an essential product for anyone who works with wood.
It is particularly useful for those who are painting or staining wood, as it can prevent unsightly knots from ruining the finished product.
With proper use, the wood knotting solutions can help to create a smooth, flawless finish that is sure to impress.
Table of Contents
What is Wood Knotting Solution?
The wood knotting solution is a type of sealer that is used to cover knots in the wood. Knots in wood can be problematic as they can cause the wood to split or crack over time.
The wood knotting solution is designed to seal the knots and prevent this from happening.
The solution is typically made from a combination of shellac and a solvent such as methylated spirits. It can be applied using a brush or a spray gun and is usually left to dry for several hours before the wood is sanded and finished.
The wood knotting solution is commonly used in woodworking and carpentry projects, especially when working with softwoods such as pine, spruce, or fir.
It can also be used on hardwoods but is less commonly needed as hardwoods tend to have fewer knots.
Preparing the Surface
Before applying the wood knotting solution, it is important to properly prepare the surface. This will ensure that the solution adheres well and provides optimal results.
The preparation process involves two main steps: cleaning the surface and sanding the surface.
Cleaning the Surface
The first step in preparing the surface is to clean it thoroughly. This will remove any dirt, grease, or other contaminants that may interfere with the knotting solution’s ability to penetrate the wood. To clean the surface, follow these steps:
- Wipe down the surface with a clean, dry cloth to remove any loose debris.
- Mix a solution of warm water and mild soap.
- Dip a sponge or cloth into the solution and wring it out well.
- Gently scrub the surface with the sponge or cloth, being careful not to saturate the wood.
- Rinse the surface with clean water and dry it thoroughly with a clean, dry cloth.
Sanding the Surface
The second step in preparing the surface is to sand it. Sanding will smooth out any rough spots and create a surface that is more receptive to the knotting solution. To sand the surface, follow these steps:
- Choose the appropriate sandpaper grit. For most surfaces, a medium grit sandpaper (around 120 grit) will work well.
- Wrap the sandpaper around a sanding block or use a power sander.
- Sand the surface in the direction of the wood grain, using a back-and-forth motion. Be sure to apply even pressure and avoid sanding too aggressively.
- Wipe down the surface with a clean, dry cloth to remove any sanding dust.
Applying the Wood Knotting Solution
Shaking the Solution
Before applying the wood knotting solution, it is important to shake the can well. This helps ensure the solution is properly mixed and ready for use.
It is recommended to shake the can for at least one minute before using it.
Using a Brush or Roller
When applying the wood knotting solution, a brush or roller can be used. A brush is typically used for smaller areas or intricate details, while a roller is ideal for larger areas.
It is important to use a high-quality brush or roller to ensure a smooth and even application.
When using a brush or roller, it is recommended to apply the solution in the direction of the wood grain. This helps to ensure that the solution is absorbed into the wood properly.
It is also important to avoid applying too many solutions at once, as this can lead to drips and an uneven finish.
Applying Multiple Coats
For best results, it is recommended to apply multiple coats of wood knotting solution. This helps to ensure that all knots and imperfections are properly sealed and will not bleed through the final finish.
Allow each coat to dry completely before applying the next coat.
It is important to note that the number of coats needed may vary depending on the type and condition of the wood. It is recommended to follow the manufacturer’s instructions for the best results.
Drying and Sanding
After applying the wood knotting solution to the surface, allowing it to dry completely before sanding is important. This will ensure that the solution has had enough time to penetrate the wood and create a strong bond.
The drying time will vary depending on the type of solution used and the temperature and humidity of the environment.
Drying Time
As a general rule, most wood knotting solutions will take between 1-2 hours to dry completely.
However, it is recommended to consult the manufacturer’s instructions to determine the exact drying time for the specific solution being used.
It is important to note that rushing the drying process can result in a weaker bond and may cause the solution to crack or peel over time.
Sanding the Surface Again
Once the wood knotting solution has dried completely, it is time to sand the surface again. This will help to smooth out any rough spots or bumps and prepare the surface for painting or staining.
It is recommended to use fine-grit sandpaper (220 or higher) to avoid damaging the wood or the knotting solution.
When sanding, it is important to wear a dust mask and eye protection to avoid inhaling any dust or debris.
Sand in the direction of the wood grain, using light pressure and making sure to sand evenly across the entire surface.
Once the sanding is complete, wipe the surface with a clean, damp cloth to remove any dust or debris.
Finishing Touches
After applying the wood knotting solution, it is important to finish the surface properly to protect it and enhance its appearance. Here are some tips for finishing touches:
Staining or Painting the Surface
If you want to add color to the wood, staining or painting is a good option. Make sure to choose a stain or paint that is compatible with the wood knotting solution you used.
Follow the manufacturer’s instructions for application and drying time. Sand the surface lightly between coats to ensure a smooth finish.
Applying a Protective Finish
To protect the surface from moisture, scratches, and other damage, apply a protective finish such as varnish, lacquer, or wax.
Choose a finish that is appropriate for the type of wood and the intended use of the surface. Follow the manufacturer’s instructions for application and drying time. Sand the surface lightly between coats to ensure a smooth finish.
Always work in a well-ventilated area and wear protective gear such as gloves and a mask when working with a wood knotting solutions and finishing products.
With these finishing touches, your wood project will be ready to use and enjoy for years to come.
Conclusion
In conclusion, wood knotting solution is a product used to seal and stabilize knots in wood surfaces. To use wood knotting solution, you need to follow these steps:
- Clean the wood surface: Use a cloth or brush to clean the surface of the wood and remove any debris or dust.
- Shake the wood knotting solution: Shake the container of wood knotting solution to ensure it is thoroughly mixed.
- Apply the wood knotting solution: Using a brush, apply the wood knotting solution to the knot or wood surface. Make sure to apply enough solution to cover the entire knot or wood area.
- Allow the wood knotting solution to dry: Leave the wood knotting solution to dry for the recommended amount of time, usually between 1-2 hours.
- Sand the wood surface: Once the wood knotting solution is completely dry, sand the wood surface with fine-grit sandpaper until it is smooth.
- Apply a finish: Apply a wood finish of your choice over the wood knotting solution to protect the wood surface and improve its appearance.
Overall, using wood knotting solution is a simple process that can help improve the durability and appearance of wood surfaces with knots.
By following the steps outlined above, you can achieve a smooth and even surface that is free from knots and other imperfections.
- How to Build a Planter Box for Bamboo: A Step-by-Step Guide
- Can Robotic Lawnmowers Handle Steep Slopes?
- Do You Need a Specific Lawn for a Robotic Lawnmower? Expert Advice

- Are Robotic Lawnmowers Safe for Pets and Children? Safety Features of Robotic Lawnmowers

- Why Use Robotic Lawnmowers? Advantages of Using a Robotic Lawnmower

- Is the GARDENA SILENO City 300 Cordless or Corded? A Clear Answer


