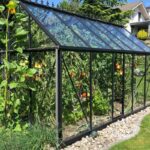
A patio cover provides you with shade year-round. If you want to make a simple one, you’ll need to have at least two posts to hold up the cover. Making your own is inexpensive, and you can make the design as simple as you want!
To build a simple patio cover, you first need to choose a material. Then, choose a simple plan to follow. You can connect the awning to the home then have the two posts support it over the rest of the patio. However, there are plenty more simple designs to try!
Table of Contents
What Do I Need To Make a Simple Patio Cover?
First, you’ll want to gather your supplies to make the patio cover. Start by thinking about what designs you want and what your budget will look like beforehand.
Do you want something to match your patio and home? Do you want two posts, four posts, or a large umbrella?
Plus, it’s good to consider the materials you want. Most people choose wood, metal, vinyl, or aluminum for patio covers.
There are many possibilities, even building a simple patio cover! Take the time to research the cover designs you want. You can create everything from scratch or purchase a DIY patio cover kit online.
Once you have ideas in mind for your cover, you can get to planning. With a simple cover, you need to make sure you have enough material to cover your patio space.
How Do I Make a Simple Patio Cover?
Start by collecting your materials. You will need your rafter beams, posts, and roof cover for a simple patio cover. Your final design should have a sloped roof so that water and debris don’t build up on top.
Once you have your pitch planned, you can determine the rafter beams’ length, size, and spacing.
You will have different calculations depending on the type of wood you use, so it’s a good idea to use the American Wood Council Span Calculator.
Now that you have your measurements, you can build any patio cover you want! Make sure you contact your local building codes.
Some areas have different rules on what you can and can’t build. If you dig a new foundation, you’ll need to call 811 first.
Next, you can consider plenty of different design options. Below are all the DIY ideas that we thought were the best!
DIY Metal Roof With Three Posts
Corrugated metal roofing is an easy-to-find material. It also doesn’t cost much and is pretty simple to build with. You can connect it to your home while customizing the plans to get the best coverage.
Before you start, you might need to expand the patio and give it a strong concrete foundation. Next, you’ll need these materials:
- Metal roofing
- 6 x 6-inch posts
- 4 x 6-inch beam
- 2 x 4-inch rafters (may vary depending on what you got in the Span Calculator)
Mark where you’re going to place the posts on the patio with chalk. Take your time measuring everything carefully- the three main posts need to be equally spaced.
You can use post anchors to secure the posts in the concrete foundation.
You can connect the rafters to the home and the posts. They should also be spaced equally, depending on your calculations.
Next, you want the beams to connect diagonally to the posts to provide support. From there, you can install the metal roofing.
Overall, this is one of the simplest patios that you can make! You’ll need to have some experience measuring and using the tools for the best results.
It’s very customizable, and you can change the materials as you want. For example, you can swap the metal roof for shingles.
DIY A-Line Patio Cover Roof
If you live somewhere there’s a lot of precipitation, then having an A-line roof would better suit you. Water and snow can run off easier, instead of building up on top and causing damage. You will need:
- Roofing
- 4 x 4 beams
- 2 x 6 rafters
- 2 x 2 supports
You can build a simple structure with four beams using 4 x 4 planks in plastic post anchors. Once you’ve made sure they’re level, connect them with 2 x 6 planks for rafters.
The rafters meet at the top at an angle to fit together. A beam should run down the middle of the A’s point, giving it more support.
From there, you can form a grid by connecting the 2 x 4s with 2 x 2 passing between them horizontally. Doing so gives you a stable surface to finish with your roof!
DIY Patio Cover Kit
If you feel intimidated finding all of the parts yourself, don’t worry! You can find plenty of DIY patio cover kits online. They come with everything you need to make a patio cover.
You’ll first need to take measurements of your patio space before ordering. If you don’t, you could easily order the wrong size.
As another benefit, these kits come with plenty of detailed instructions. They should have a written guide with images, and many also come with video guides to follow.
Lastly, you can always call the company if you encounter any issues during construction.
Easy Draping Umbrella Patio Cover
Umbrella patio covers come in various shapes, colors, and designs! You can style them to add your themes to your deck. They’re straightforward to set up and cost less than making a patio cover.
However, you can still DIY an umbrella patio cover. You can create a beautiful umbrella cover that drapes over your patio using hooks and sheer fabric.
Start by measuring the patio, then ordering a sheet of fabric in a slightly smaller size. You’ll need to sew a pocket where PVC pipe can fit into the sheet without falling out.
Next, drill a hole near the tip of the pipe and insert it into the fabric. Drill another hole into the wall, insert a hook, then hang the tube by the hole near the tip. The final effect is a simple, DIY canopy umbrella.
- How to Build a Planter Box for Bamboo: A Step-by-Step Guide

- Can Robotic Lawnmowers Handle Steep Slopes?
- Do You Need a Specific Lawn for a Robotic Lawnmower? Expert Advice
- Are Robotic Lawnmowers Safe for Pets and Children? Safety Features of Robotic Lawnmowers
- Why Use Robotic Lawnmowers? Advantages of Using a Robotic Lawnmower

- Is the GARDENA SILENO City 300 Cordless or Corded? A Clear Answer